{
  "deploy": {
    "frontend": {
      "output": "frontend/build",
      "type": "static",
      "commands": [
        "cd frontend",
        "npm install",
        "export NODE_ENV=production && npm run build"
      ]
    }
  },
  "develop": {
    "frontend": {
      "path": "frontend",
      "port": 8080,
      "startCommand": "npm start"
    }
  },
  "entitlements": {
    "InstantRemixing": true,
    "InstantRemixingNativeNavigation": true,
    "FeedEvents": true
  },
  "remixData": {
    "spinningImageSrc": "https://upload.wikimedia.org/wikipedia/commons/a/a7/React-icon.svg"
  }
}Start typing to search...
Tutorials
Learning Koji
6. Creating a remixable project
Search
Creating a remixable project
In the previous section of the quick start tutorial, you learned about contexts and how they help to deliver the remix experience that makes Koji such a powerful platform. In this section, you’ll dive into what you need to do in the code to allow users to remix and publish their own customized versions of your project.
By the end of this section, you should feel comfortable:
-
Using the
koji.jsonfile to set your initial remix data. -
Using
get,set, andfinishmethods to manage the remix data and the publish flow. -
Using a
subscribemethod to determine when the user is toggling a live preview.
Thinking about remixes
As we briefly touched on in your first remix, every remix that is created from a template uses the same code and loads the same web application. But, as we also learned, each remix can look and behave in dramatically different ways, depending on the customization options exposed by the template.
If you think about common web applications, such as Facebook, Gmail, and Reddit, they all load the same basic JavaScript code and run it in a browser. They rely on user-specific data to deliver a different experience to everyone. And, they typically store that user-specific data in a database, which is separate from the code that runs in the browser.
Koji remixes work in a very similar way. When a user remixes a template, the remix loads the same code that the template uses. To provide the customized remix experience, Koji relies on remix-specific data, data that is also stored in a database and separate from the code that is run in the browser. The only difference between a template and all the remixes that are created from it is the remix-specific data that is stored in Koji’s database.
So, to create a remixable template, you need a way to specify your remix-specific data, collect the values for the data from the user, and store the data in Koji’s database. Fortunately, the @withkoji/core package does a lot of the heavy lifting for you.
Let’s start by going back to your project in the code editor. If you’ve closed the code editor since the last section, you can go to the Developer Portal to open a list of your projects.
Working with remix data
If you think back to when we remixed the Bouncy Blast game, there were a few things in that game that the player could customize: the player image, the enemy image, the background image, and the background music. When a remix is created, the player’s choices are stored in a database. When someone views the remix, those choices are loaded.
If you think back to when we previewed the game, it also worked before we created the remix. That’s because there are a default set of values that are loaded if remix-specific data doesn’t exist. You can think about remix-specific data as being a layer of data on top of the default data.
Adding default remix data to koji.json
To create a default layer of remix data, you add a remixData key to the koji.json file in the root of your project, and populate it with the default remix data that you want to use.
Open the koji.json file and add a few lines to the end of the file so that it looks like the following.
There is quite a lot going on in this file, but for the purposes of this section, we only need to focus on what’s happening in the remixData key.
Notice that we’ve added one key-value pair:
"spinningImageSrc": “https://upload.wikimedia.org/wikipedia/commons/a/a7/React-icon.svg"
If that value looks familiar, good!
It’s the same value that we were using as the default state value for the spinning image in our project.
By defining it in the koji.json file as a remixData property, we’re telling Koji that it’s the default value for the spinningImageSrc property.
Double-check that your JSON is valid, and make sure you save the changes.
Using Koji.remix.get to retrieve remix data
We can use the remix module from the @withkoji/core package to start using the default remix data we just stored in the koji.json file.
Open /frontend/src/App.js.
Change
const [logoSrc, setLogoSrc] = useState('https://upload.wikimedia.org/wikipedia/commons/a/a7/React-icon.svg');
to
const [logoSrc, setLogoSrc] = useState(Koji.remix.get().spinningImageSrc);
If you save the file and refresh the preview pane, you should see the same spinning React logo that you did before.
Except now, instead of hard-coding the default value, you’re using Koji.remix.get() to retrieve the value from the koji.json file.
Using Koji.remix.set to set remix data
You used Koji.remix.get to retrieve remix data.
Now, what if you want to allow a user to save a remix-specific value?
We can use Koji.remix.set for that.
Let’s make an update to the captureImage function.
const captureImage = async () => {
   const src = await Koji.ui.capture.image();

   if (src) {
     setLogoSrc(() => src);
     await Koji.remix.set({ spinningImageSrc: src });
   }
 };
Using Koji.remix.set lets the platform know that we want to store the remix-specific data in Koji’s database, and to load it when someone views the remix.
When a user clicks the button, they are presented with the image picker.
When they choose an image, its URL is saved in the spinningImageSrc property.
Notice that, in addition to using Koji.remix.set to store the new value, you’re also updating the logoSrc state.
This is a good way to show a visual confirmation to the user, by presenting them with the new image that they’ve just chosen.
Managing the remix experience
We learned in the previous section that you can use Koji.playerState.context to determine the initial context, which will be default or remix.
But when a user is creating a remix, they can freely move back and forth between the remix and preview modes.
When they preview the changes, it would be helpful to show them the same content that is shown in the default context, so that the user can see something similar to what they’ll see after they publish the remix.
To enable this preview, you can use Koji.remix.subscribe, which allows the application to listen to the user’s actions when toggling back and forth between the remix and preview modes.
Update /frontend/src/App.js to look like the following.
import Koji from '@withkoji/core';
import { useEffect, useState } from 'react';
import './App.css';

function App() {
  const [logoSrc, setLogoSrc] = useState(Koji.remix.get().spinningImageSrc);

  const { context } = Koji.playerState;

  const captureImage = async () => {
    const src = await Koji.ui.capture.image();

    if (src) {
      setLogoSrc(() => src);
      await Koji.remix.set({ spinningImageSrc: src });
    }
  };

  const [userIsRemixing, setUserIsRemixing] = useState(context === 'remix');

  useEffect(() => {
    // The `Koji.playerState.subscribe` function returns an unsubscribe function to
    // remove the listener.
    const unsubscribe = Koji.playerState.subscribe((isRemixing) => {
      setUserIsRemixing(() => isRemixing);
    });

    return () => {
      // When this component unmounts, call the unsubscribe function to clean up
      // the outstanding event listener.
      unsubscribe();
    };
  }, []);

  useEffect(() => {
    Koji.ready();
  }, []);


  if (userIsRemixing) {
    return (
      <div className="App">
        <header className="App-header">
          <button onClick={captureImage}>Capture Image</button>
        </header>
      </div>
    );
  }

  return (
    <div className="App">
      <header className="App-header">
        <img src={logoSrc} className="App-logo" alt="logo" />
        <p>Some New Text</p>
      </header>
    </div>
  );
}

export default App;
There are a few changes here, so let’s walk through them.
Notice that you’re importing useEffect from react at the top of the file.
useEffect is a React hook that helps to manage side effects, like fetching data or registering event listeners.
You don’t need to worry too much about the hook syntax.
It’s more important to understand what’s being called inside each function.
In this case, you use the first useEffect to subscribe to an isRemixing listener via Koji.playerState.subscribe.
When the user moves into the preview mode, isRemixing will be false, and when the user moves back into the remix mode, isRemixing will be true.
You can use that listener to keep track of a local state: userIsRemixing.
You initialized the state with a value of context === 'remix', which we know will be true when the user first opens a remix.
The conditional render logic has also been updated, so that the remix content will be shown only if userIsRemixing is true.
You use a second useEffect to call Koji.ready().
This method lets the platform know that you’re ready to start receiving the isRemixing events that will trigger the Koji.playerState.subscribe listener.
useEffect blocks run sequentially, so by placing the Koji.ready() call in a second useEffect block, you ensure it will be called after you’ve subscribed to the listener.
The final piece is to add a way for the user to toggle between the remix and preview modes.
For that, you can leverage Koji.remix.finish().
Let’s do that by adding an additional button to the remix content.
if (userIsRemixing) {
  return (
    <div className="App">
      <header className="App-header">
        <button onClick={captureImage}>Capture Image</button>
        <button onClick={finish}>Finish</button>
      </header>
    </div>
  );
}
You also need to add the finish function, right after the captureImage definition.
const captureImage = async () => {
   const src = await Koji.ui.capture.image();

   if (src) {
     setLogoSrc(() => src);
     await Koji.remix.set({ spinningImageSrc: src });
   }
 };

 const finish = () => {
   Koji.remix.finish();
 };
Testing in the preview
Now, you can start testing the remix experience by using the preview pane in the code editor.
Make sure you’re on the Default tab, and click the Refresh icon. This refresh loads a new starting point, similar to previewing the template from the template store.
Click the Remix tab. This action mimics the user clicking Remix from the template store. You should now see the remix content, which allows you to either choose a new image or finish and preview.
Let’s start by clicking Capture Image to choose a new image. The image capture dialog box should open.
Choose a new image, then click Finish. The preview pane should change back to the Default view, and you should see the image you selected spinning in the center.
To mimic the user exiting out of the preview, you can click the Remix tab again.
At this point, you can capture a new image, or click Finish to move back to the Default view without making any changes.
Republishing
You’ve set up your remix data, and you’re using Koji.remix to get and set dynamic values.
You’ve also used Koji.playerState to subscribe to changes when the user toggles between remix and preview modes.
The final thing to do is to republish your project and test it in the wild!
Navigate back to Publish Settings by clicking on Publish Now.
Click Publish New Version.
After your project has been published, use the notification link to open it. We haven’t put this project into the template store yet, but you can still test the remix feature.
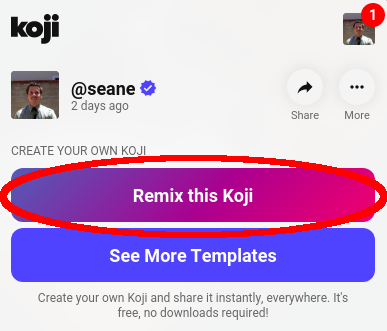
Click the Koji button, and click Remix this Koji.
You should be able to walk through the same steps you just tested in the preview pane, but this time, when you click Publish, you create a live remix from your project!
Wrapping up
In this section, you created your first remixable application. You’ve taken a big step towards unlocking the power of the Koji platform, and it’s the first of many building blocks that will allow you to create amazing experiences with your templates.
In the final section, we take a closer look at Koji’s template store. The template store is a place where you can market your templates. It’s a great place to find templates from other developers and to showcase all the amazing templates you create!