import { game } from '..'
import Entity from './Entity'

export default class Player extends Entity {
    constructor(x, y, options) {
        super(x, y, options);

        this.img = game.images.player;
        this.size = game.playerSize;
    }

    update(){

    }
}Start typing to search...
Tutorials
Creating games on Koji
2. Creating game objects
Search
Creating game objects
In the previous section of the remixable game tutorial, you configured the settings, images, and sounds for the falling objects game.
In this section, you’ll
define the Player and Collectible classes and spawn them in the game.
By the end of this section, you should feel comfortable:
-
Using the
PlayerandCollectibleclasses. -
Defining movement and position settings for the player.
-
Spawning a player into the game.
-
Defining the spawning logic and settings for collectibles.
Player
The game template uses an Entity system, which enables you to extend the base Entity class to define the game objects.
The template already has an example Player class defined, so there’s no need to create a new file.
You can start with that!
In the frontend/src/Components/Game/Entities folder, open Player.js.
Modify the constructor to use the image and size that you defined in the previous section of the tutorial.
|
Note
|
Make sure to remove any example code from the update() function.
You will modify this function later in the tutorial.
|
The Player object is now ready to be drawn on the screen.
Next, you need to instantiate it.
Adding a player to the game
To add the player to the game, open frontend/src/Components/Game/setup.js, and find the init() function.
Update it as follows.
import { game } from "."
import Player from './Entities/Player'

...

const init = () => {
    const x = game.width / 2;
    const y = game.height - 160;
    const player = new Player(x, y);
    game.addEntity(player);
    game.player = player;
}
This code does the following:
-
Instantiates a new
Playerobject, positioning it at the center-bottom of the screen. -
Adds it to the game.
-
Assigns it directly to the
gameinstance, so you access it later by callinggame.player. This will make your code a bit cleaner.
If you look at the game preview and click the Play button, you’ll now see the player near the bottom of the screen. Awesome!
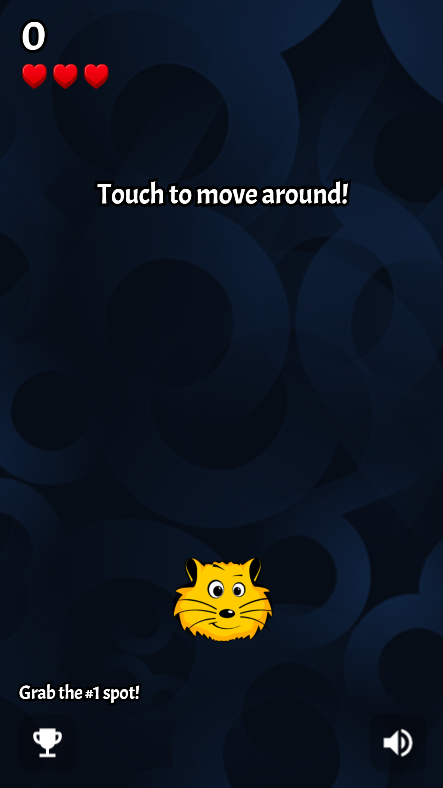
Adding movement to the player
At the moment, the player is static. Let’s change that!
In frontend/src/Components/Game/Entities/Player.js, define a new function called handleControls() to handle player movement.
Then, call the function from update(), which runs every frame.
// Don't forget the imports!
import { game } from '..';
import Entity from './Entity'
import { Smooth } from '../Utils/EasingFunctions'
...
update(){
    this.handleControls();
}

handleControls(){
    if(!game.isTouching) return; // Do nothing if we're not touching or clicking

    this.pos.x = Smooth(this.pos.x, game.mouseX, 13);
}
This code uses the Smooth function from Game/Utils/EasingFunctions.js to move the player smoothly to its goal, which is the game.mouseX touch coordinate.
The number parameter at the end determines how quickly the player moves.
The higher the number, the slower the player moves.
Feel free to experiment with different numbers to get the effect you like best.
If you try the game now, the player should move left or right when you touch or click the screen.
Now, let’s make it prettier! For example, what if the player tilted slightly in the direction it’s moving? And, how do you make sure the player won’t be able to move off the screen?
You can add these features to the Player class as follows.
import { game } from '..';
import Entity from './Entity'
import { Smooth } from '../Utils/EasingFunctions'
...
export default class Player extends Entity {
    constructor(x, y, options) {
        ...
        this.goalRotation = 0;
    }
}

update(){
    this.handleControls();

    this.rotation = Smooth(this.rotation, this.goalRotation, 8);
}

handleControls(){
    if(game.isTouching){
        this.pos.x = Smooth(this.pos.x, game.mouseX, 13);
        this.keepInsideScreen();

        const isTouchingFarEnough = Math.abs(this.pos.x - game.mouseX) > this.size / 2;

        if (isTouchingFarEnough) {
            const movingDirection = Math.sign(game.mouseX - this.pos.x);
            this.goalRotation = movingDirection * game.radians(15);
        }else{
            this.goalRotation = 0;
        }
    }else{
        this.goalRotation = 0;
    }
}

keepInsideScreen() {
    const limitLeft = this.size / 2;
    const limitRight = game.width - this.size / 2;
    this.pos.x = game.constrain(this.pos.x, limitLeft, limitRight);
}
In the keepInsideScreen() function, you are constraining the player’s x coordinate, so it doesn’t overlap or go outside the screen boundaries.
In handleControls(), you are checking whether the user is touching the screen outside of the player object.
If so, you are setting goalRotation slightly to that side.
Looking good so far!
Collectible
Now that you’ve added the player, you need to add the falling objects to collect.
In frontend/src/Components/Game/Entities, create a Collectible.js file.
Add the following contents to the new file.
import { game } from '..'
import Entity from './Entity'

export default class Collectible extends Entity {
    constructor(x, y, options) {
        super(x, y, options);

        this.img = game.images.collectible;
        this.size = game.random(game.collectibleSizeMin, game.collectibleSizeMax);
        this.tag = "collectible";
        this.velocity.y = game.random(game.speedMin, game.speedMax);
        this.rotSpeed = game.random(-0.03, 0.03);
        this.isCollected = false;
    }
}
This constructor defines the following properties for the Collectible class.
-
this.img = game.images.collectible– Sets the image for the object to the previously loadedCollectibleimage. -
this.size = game.random(game.collectibleSizeMin, game.collectibleSizeMax)– Sets the size of the image to a random value betweengame.collectibleSizeMinandgame.collectibleSizeMax. -
this.tag = "collectible"`– Sets an identifying tag, so you can locate it by usinggame.findByTag(). -
this.velocity.y = game.random(game.speedMin, game.speedMax)– Sets the vertical velocity to a random value betweengame.speedMinandgame.speedMax. -
this.rotSpeed = game.random(-0.03, 0.03)– Sets the rotation speed to a random value between-0.03and0.03. -
this.isCollected = false– Defines a Boolean property to track whether the object has been collected and sets the property to false.
This code uses some properties that haven’t been defined yet.
Open frontend/src/Components/Game/preload.js, and add these properties to initializeValues().
...
const initializeValues = () => {
    ...
    game.speedMin = 2;
    game.speedMax = 4;
    game.collectibleSizeMin = isMobile() ? 55 : 85;
    game.collectibleSizeMax = isMobile() ? 75 : 105;
}
The Entity class handles the movement of objects based on their velocity property.
Since you already set the velocity in the Collectible constructor, that’s all you need to do to make the collectibles fall down indefinitely.
Now, let’s try spawning some!
Spawning collectibles
Collectibles need to spawn throughout the game, not just in the beginning like the player does.
You handle the collectibles logic in frontend/src/Components/Game/draw.js, because every function in this file will run with each game frame.
Add a manageSpawn() function to handle the spawning logic and call it from draw().
Add a spawnCollectible() function to add new collectibles to the game.
...
import Collectible from './Entities/Collectible'

const draw = () => {
    ...
    manageSpawn();
}

const manageSpawn = () => {
    game.spawnTimer -= game.delta();

    if (game.spawnTimer <= 0) {
        spawnCollectible();
        game.spawnTimer = game.random(game.spawnPeriodMin, game.spawnPeriodMax);
    }
}

const spawnCollectible = () => {
    const x = game.random(0, game.width);
    const y = -game.collectibleSizeMax;
    game.addEntity(new Collectible(x, y));
}
This code spawns collectibles according to the following logic.
-
Every frame,
game.spawnTimeris decreased bygame.delta().game.delta()is a helper function that’s basically a shortcut for calling1.0 / game.frameRate(), which represents the time since the last frame was rendered. It allows you to calculate time-based increments. -
When the timer reaches
0, a new collectible is spawned at a random point above the screen and the timer is reset to a random value betweengame.spawnPeriodMinandgame.spawnPeriodMin.
If you save the changes now, the game won’t generate any falling objects and it might crash because spawnPeriodMin, spawnPeriodMax, and spawnTimer must still be initialized.
Open frontend/src/Components/Game/preload.js and add the following lines to initializeValues().
...
const initializeValues = () => {
    ...
    game.spawnPeriodMin = 1.5; // Time in seconds
    game.spawnPeriodMax = 2; // Time in seconds
    game.spawnTimer = 0.1;
}|
Note
|
After compile errors have been resolved, you might need to reload your live preview manually for everything to work correctly again. |
If you start the game now, you’ll see a bunch of donuts appearing every 1.5 to 2 seconds and falling to the bottom.
Wrapping up
In this section, you created the Player and Collectible classes, and then spawned them in the game.
In the next section, you’ll give them the ability to interact – that is, for the player to catch (or miss) a falling collectible.