<FeaturedImage
    src={optimizeImage(remixValues.imgPlayer, 150, 150)}
    rotation={randomRange(-30, 30)}
    style={{
        left: '50%',
        top: '50%'
    }}
/>Start typing to search...
Tutorials
Creating games on Koji
6. Customizing the preview
Search
Customizing the preview image
In the previous section of the remixable game tutorial, you added an option for users to customize the collectible image. There’s one more thing to take care of before releasing your new game into the wild.
In this section, you’ll customize the preview image that is displayed when users share their remixes on social media.
By the end of this section, you should feel comfortable:
-
Adding collectibles to the
Screenshotcomponent. -
Testing a custom preview image.
How it works
When users share their remixes on social media, the preview (Open Graph) image is based on a screenshot of the Koji. A fun, custom preview image helps make sure that people are drawn to click on it.
In the game template, frontend/src/Components/Screenshot/index.js is already set up to render a custom view for the preview screenshot.
|
Note
|
To see what the preview image currently looks like, use the Thumbnail tab of the Debugger or the Live Preview in the Koji editor. |
Editing the Screenshot component
By default, the Screenshot component already shows imgPlayer in the center.
It looks something like the following.
To move the player down a bit, change the top value to something like 80%.
<FeaturedImage
    src={optimizeImage(remixValues.imgPlayer, 150, 150)}
    rotation={randomRange(-30, 30)}
    style={{
        left: '50%',
        top: '80%'
    }}
/>
Next, add some collectible images.
-
Copy and paste the
FeaturedImagecode several times below the original. -
In each copy (but not in the original), change
remixValues.imgPlayertoremixValues.imgCollectible. -
Change the values for
leftandtopin each copy. They don’t have to be exactly the same as the examples. You can play around and see what you like best. You can even randomize their positions if you want!
<FeaturedImage
src={optimizeImage(<FeaturedImage
src={optimizeImage(remixValues.imgPlayer, 150, 150)}
rotation={randomRange(-30, 30)}
style={{
left: '50%',
top: '80%'
}}
/>
<FeaturedImage
src={optimizeImage(<FeaturedImage
src={optimizeImage(remixValues.imgCollectible, 150, 150)}
rotation={randomRange(-30, 30)}
style={{
left: '50%',
top: '50%'
}}
/>
<FeaturedImage
src={optimizeImage(remixValues.imgCollectible, 150, 150)}
rotation={randomRange(-30, 30)}
style={{
left: '35%',
top: '25%'
}}
/>
<FeaturedImage
src={optimizeImage(remixValues.imgCollectible, 150, 150)}
rotation={randomRange(-30, 30)}
style={{
left: '75%',
top: '35%'
}}
/>
<FeaturedImage
src={optimizeImage(remixValues.imgCollectible, 150, 150)}
rotation={randomRange(-30, 30)}
style={{
left: '45%',
top: '50%'
}}
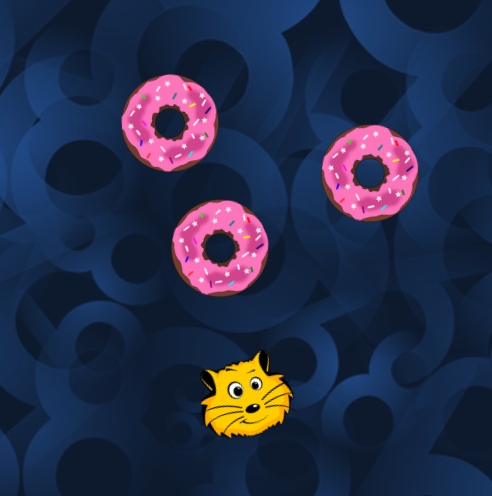
/>After you are done, the preview image should look something like this example.
Wrapping up
Congratulations! You’ve reached the end of the tutorial!
In the final section, you’ll publish your game and see some suggestions for going forward.